
www.rabbitcalls.com+91 8140501868support@rabbitcalls.com
Onboarding
First purchase a plan in Billing, then get a phone number (Request KYC or connect Twilio) so you can place calls.
Module guide
Onboarding
First purchase a plan in Billing, then get a phone number (Request KYC or connect Twilio) so you can place calls.
Onboarding path
Do these in order. Without a plan/wallet and a number, agents and campaigns cannot go live.
- 1 — Purchase / activate a plan in Billing (wallet credit)
- 2 — Add a phone number — Request a Number (KYC) or Connect Twilio
- 3 — Assign an Agent, add Knowledge base, then Test call
Step 1 — Purchase a plan (Billing)
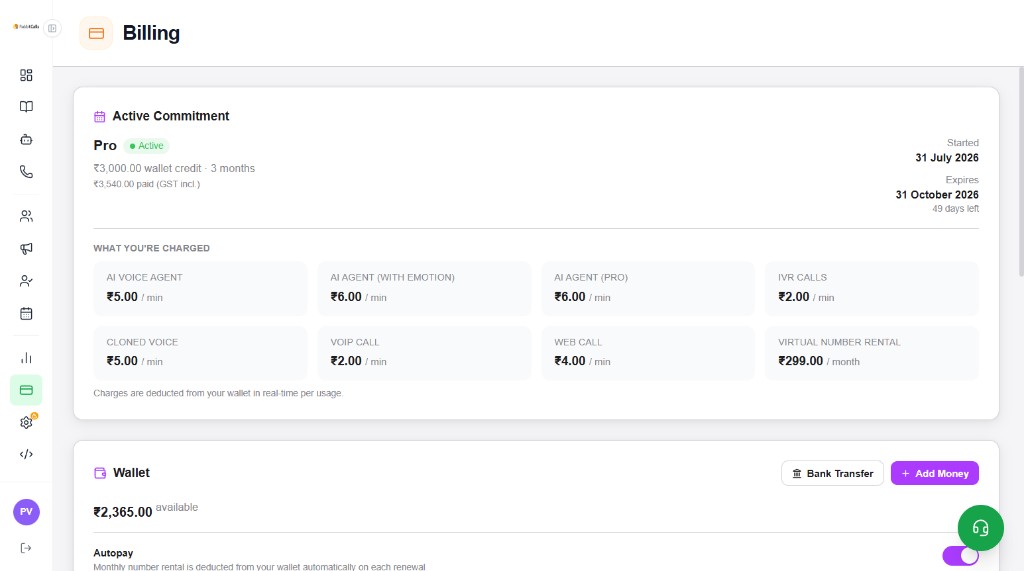
Open Billing in the app sidebar. Buy or activate a commitment (e.g. Startee or Pro). You get wallet credit for the plan period; usage (AI minutes, IVR, web call, number rental) is deducted from the wallet in real time.
- Check Active Commitment — plan name, wallet credit, start/expiry
- Review What you're charged — AI ₹5/min, Emotion/Pro ₹6/min, IVR ₹2/min, Web ₹4/min, number rental ₹299/mo, etc.
- Use + Add Money or Bank Transfer if the wallet is low
- Turn Autopay On so monthly number rental renews from the wallet
Step 2 — Add a phone number
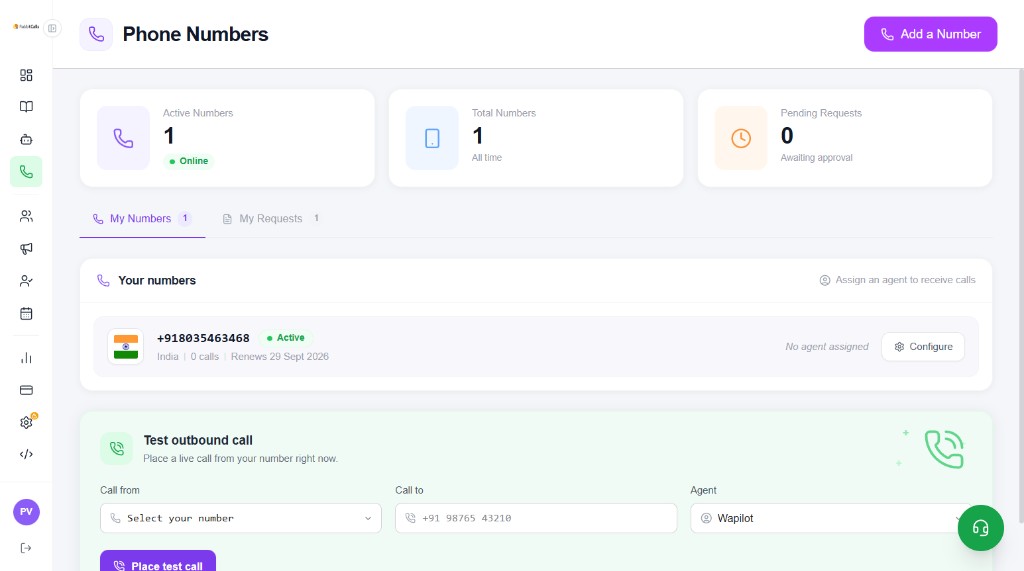
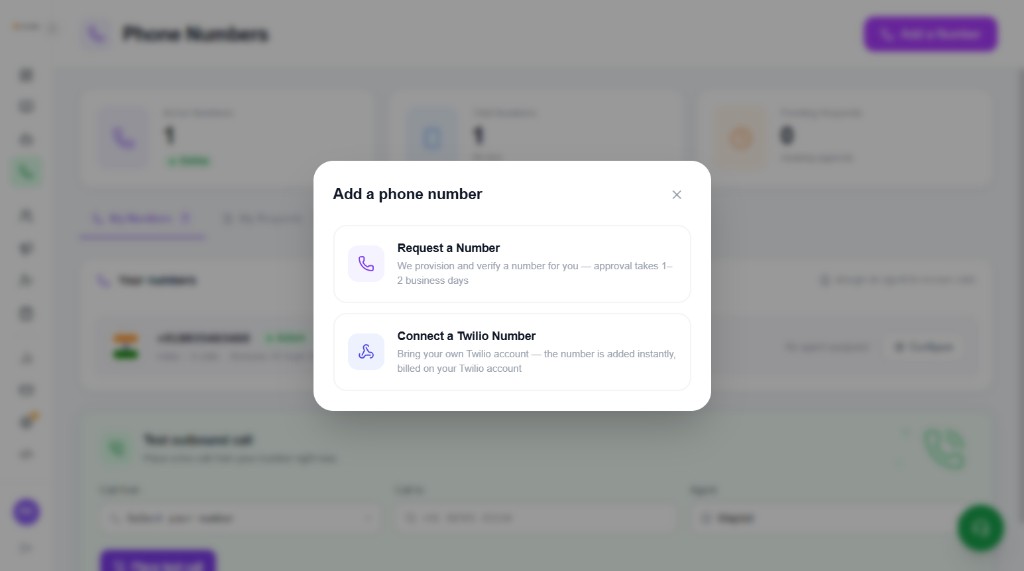
Open Phone numbers → + Add a Number. Choose one path:
- Request a Number — we provision an Indian number (KYC, 1–2 business days)
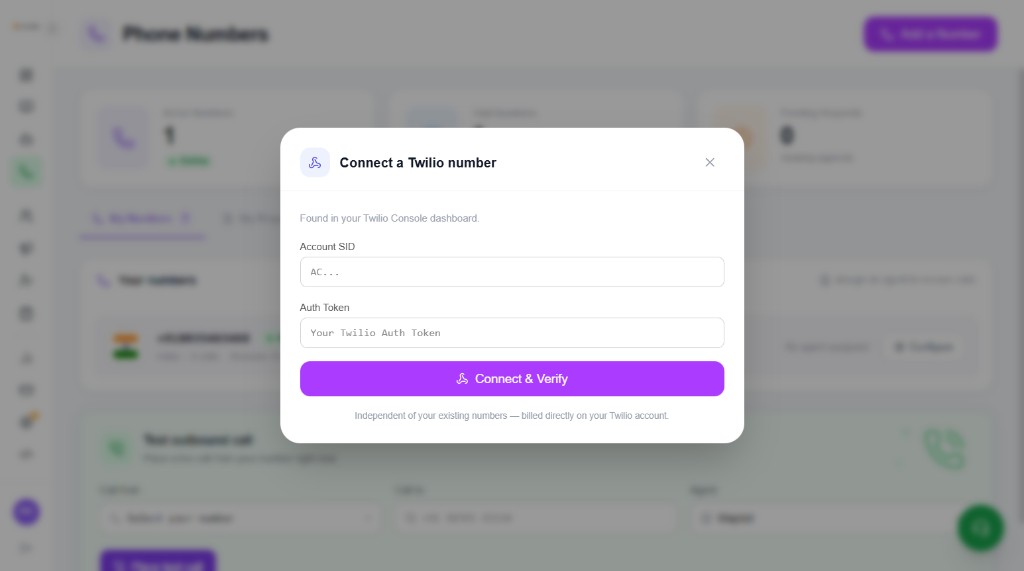
- Connect a Twilio Number — bring your Twilio Account SID + Auth Token (instant, billed on Twilio)
Option A — Request a Number (KYC)
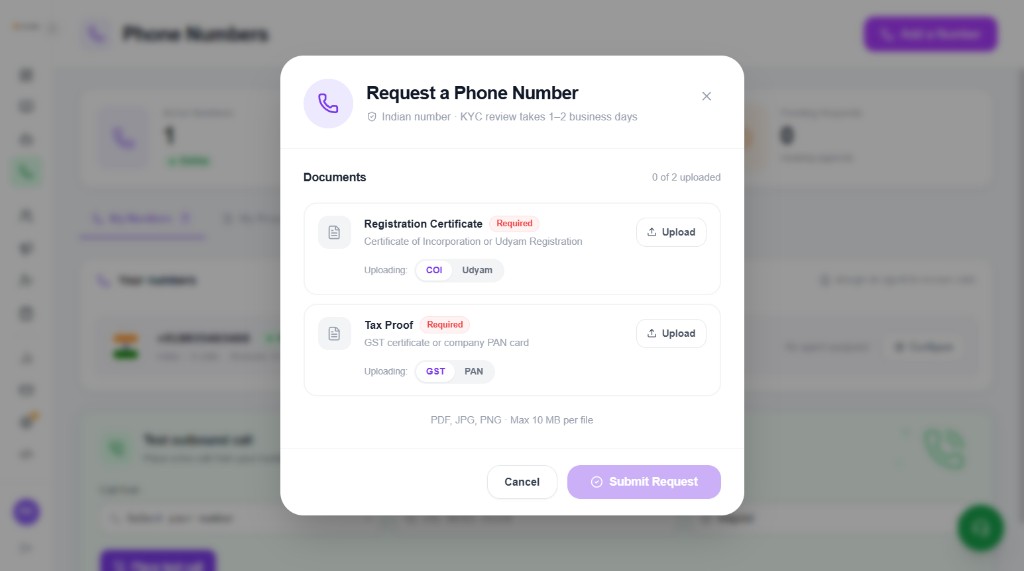
Upload Registration Certificate (COI or Udyam) and Tax Proof (GST or PAN). Submit Request, then track Pending Requests / My Requests. Expect 1–2 business days — waiting only 24 hours is too early.
- PDF, JPG, PNG — max 10 MB per file
- If you lack certificates, use official gov portals (MCA, Udyam, GST, PAN) — see Phone numbers guide
- After Active, open Configure and assign an Agent
Option B — Connect Twilio
From Add a Number → Connect a Twilio Number. Paste Account SID (AC…) and Auth Token from Twilio Console → Connect & Verify. Billing for that number stays on Twilio.
Step 3 — Go live checklist
With plan + Active number in place, finish product setup:
- Knowledge base — upload FAQs/docs and wait for Indexed
- Agents — create/deploy agent, attach KB, enable booking if needed
- Phone numbers → Configure — assign the agent
- Test outbound call on Phone numbers (or Web call / Test call on Agents)
- Optional: Audience → Campaigns for outbound at scale